A loud hum from your motor starter panel is rarely normal. A new buzz, a steady rattle, or a contactor that keeps dropping in and out almost always points to one of a handful of field-repairable faults — unstable coil voltage, a worn shading ring, dirty pole faces, pitted contacts, or a coil that is on its way out. The trick is to match the sound to the cause before you replace anything, and to do it with the power locked out. This walkthrough covers the diagnostic sequence we use on AC contactor panels and the specific repairs that bring a noisy contactor back to a clean, silent close.
If you are not yet sure what a contactor is or how its parts fit together, start with our beginner guide to contactors and how they work before diving into the fault-finding steps below.
Why Is My Contactor Buzzing or Chattering?
An AC contactor makes a faint 50/60 Hz hum when it is healthy — that is the shading ring doing its job at the pole faces. A loud or intermittent sound is different. Two distinct noises show up in the field:
- Buzzing — the contactor stays closed but the magnetic system is vibrating. The plunger is not seating firmly, so the contactor never fully latches.
- Chattering — the armature repeatedly pulls in and drops out, sometimes several times a second. The contactor is technically working, but every break is an arc event on the main contacts.
Both faults share the same root categories: insufficient or unstable coil voltage, a worn or contaminated magnetic assembly, a degraded shading ring, mechanical binding, or contacts so pitted that the armature cannot land squarely. The way you tell them apart is by where the noise happens and when it starts.
Safety First: Lockout Before Troubleshooting
A contactor is a switching device — it does not provide overcurrent protection on its own, which is why we use it together with breakers and overloads as explained in our contactor vs circuit breaker comparison. That also means the line terminals can still be live even when the coil is off.
Before opening the enclosure or touching terminals:
- Stop the driven equipment and apply lockout/tagout on every power source — both line voltage and control voltage.
- Verify zero energy with a tester using the live-dead-live method.
- Discharge any capacitors and secure moving machinery.
- Never hold the armature down by hand or with a tool — the magnetic force is enough to injure fingers.
Only qualified personnel should perform energized measurements. All other checks below assume the contactor is fully isolated.
Quick Contactor Troubleshooting Table
| Symptom | Likely Cause | First Check | Recommended Fix |
|---|
| Steady loud buzz, contactor stays closed | Dirty pole faces, weak coil, broken shading ring, loose mounting | Compare to normal operation; inspect armature seating and coil label | Clean pole faces, correct coil spec, tighten mounting, or replace contactor |
| Rapid pull-in and drop-out (chatter) | Low or unstable coil voltage, undersized control transformer, poor aux contact | Measure A1–A2 voltage during pickup and during motor start | Repair the voltage drop or control-circuit fault before replacing parts |
| Coil energised, contactor will not pull in | Wrong coil voltage, mechanical binding, damaged magnetic assembly | Verify coil rating and free movement of armature | Correct supply or remove obstruction; replace failed coil only if it is an approved replaceable part |
| No response when commanded | Open control circuit, blown fuse, failed output device, open coil | Trace the command path and check voltage at A1–A2 | Restore control circuit or replace the contactor if the coil is open |
| Contactor will not release | Welded power contacts, mechanical binding, residual control voltage | Confirm the coil is fully de-energised; check for residual voltage | Correct the control issue; replace the contactor if contacts are welded |
| Excess heat, discoloration, burning smell | Loose termination, overload, pitted contacts, wrong utilisation category, persistent chatter | Isolate and inspect terminals, contact condition, load current, contactor rating | Correct the root cause and replace any heat-damaged equipment |
Step 1 — Listen Before You Touch
Stand in front of the contactor with the cover removed (lockout-tagout observed) and listen. A hum that appears only when an adjacent large motor starts is almost never a contactor fault — it is a supply sag. A hum that appears under load or after warm-up usually points at the shading ring or the coil. A buzz that started after the enclosure was re-seated differently often points at the mounting bolts. A contactor that hums during the plant’s peak demand window and goes silent overnight is being starved of voltage — replacing it will not fix anything; you need to chase the supply.
Step 2 — Measure Coil Voltage Under Fault
Use a true RMS multimeter across A1 and A2 while the contactor is commanded to close. Compare the reading to the coil’s nameplate rated voltage and the manufacturer’s published operating limits.
- Below 85 % of rated — the magnetic field is too weak to hold the armature. Chasing the contactor itself wastes time; chase the control circuit instead (transformer size, undersized wiring, bad aux contact, voltage drop on long control runs).
- Above 85 % of rated — supply is fine. The fault is inside the contactor.
If you are diagnosing a self-holding circuit, also measure voltage after the auxiliary NO contact has latched the coil in. A worn or dirty auxiliary introduces resistance and lets voltage sag right when the contactor needs to hold — that produces the classic “closes for half a second, then chatters” symptom.
Step 3 — Inspect the Pole Faces and Shading Ring
De-energise, remove the armature, and look at the mating pole faces. They should be smooth, clean, and fully lapped. What you are looking for:
- Dust, oil, or rust on the pole faces — creates an air gap, weakens the holding flux, and produces a buzz. Wipe with a soft dry cloth; never sand or file the faces — that destroys the lapped surface and guarantees future chatter.
- Cracked or broken shading ring — the small copper loop embedded in one pole face. Once cracked, the contactor hums at exactly 50 or 60 Hz. The ring is not field-serviceable on most modern contactors. Replace the contactor.
- Bent laminations or swarf from nearby drilling — a single metal shaving can hold the armature 0.1 mm off the seat and start a buzz.
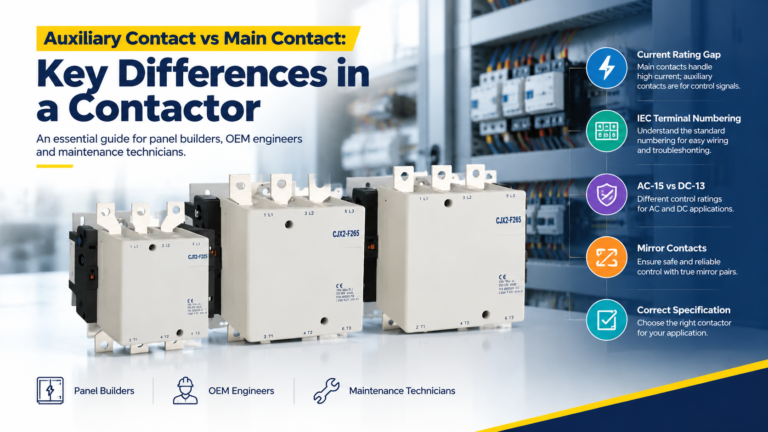
A CJX2-F series contactor uses precision-machined pole faces and a reinforced shading ring that survives decades of operation. Once a shading ring fails on a legacy unit, replacement is faster and more reliable than trying to service it.
Step 4 — Test the Coil Resistance
With power still off, set the multimeter to ohms and probe across the coil terminals. A healthy coil reads between roughly 5 and 100 Ω (model-dependent — always check the nameplate). OL (open line) means the winding is broken; near zero ohms means the coil has shorted internally. Either way, the contactor must be replaced — a burned coil cannot be field-repaired. If the coil checks out but still runs hot, the supply voltage may be on the high side of the spec or the coil is being held in for long periods (duty cycle mismatch). Both conditions shorten coil life.
Step 5 — Inspect the Main Contacts
With the contactor manually depressed (no power), set the meter to ohms and probe each pair of L–T poles. A healthy closed contact reads below 0.5 Ω. Anything above a few ohms means the contact face is oxidised, pitted, or worn past its useful thickness. Release the plunger; the meter should read OL on all poles. If it still shows continuity, the contacts have welded.
For a deeper walkthrough, see our full contactor testing guide and our checklist of seven warning signs that a contactor is going bad.
Common Fixes by Root Cause
| Root Cause | Field Repair |
|---|
| Low control voltage | Upsize control transformer; tighten control terminals; replace undersized aux contact |
| Dirty pole faces | Wipe with dry cloth — never sand or file |
| Broken shading ring | Replace the contactor — not field-serviceable |
| Pitted or blackened contacts | Light dressing only with a burnishing tool; replace if deeply pitted or welded |
| Open or shorted coil | Replace the contactor (or approved replaceable coil if the manufacturer offers one) |
| Welded power contacts | Replace the contactor immediately; do not try to pry the contacts apart |
| Loose mounting | Tighten to manufacturer torque spec; verify flat, rigid mounting surface |
When to Replace the Contactor (Not Repair It)
Some failures end the discussion: welded contacts (do not try to pry them apart), a broken shading ring, a cracked or melted housing, or heat-damaged insulation on the coil or wiring. When that happens, replace the contactor and inspect the connected conductors for collateral damage.
When you do replace, match four specifications: coil voltage, full-load amps (FLA), locked-rotor amps (LRA) or utilisation category, pole count, and physical dimensions. For sizing logic, see our contactor sizing and AC-3 selection guide, and for the wiring side of an installation, our wiring walkthrough for power, coil, auxiliary, and overload circuits.
Preventive Maintenance Checklist
- Listen to each contactor at startup. Compare to the baseline sound after commissioning.
- Measure coil voltage under normal load; record it for trend tracking.
- Inspect the enclosure for dust, moisture, insects, and heat discoloration.
- Verify mounting bolts and terminal screws are at torque spec.
- Confirm the contactor is mounted on a flat, rigid surface — a bowed rail causes chatter.
- Log cycle counts and replace contactors at the manufacturer’s mechanical-life limit rather than waiting for failure.
A contactor that is buzzing today will weld shut or burn open within weeks. Diagnose the sound, fix the root cause, and replace the contactor when the failure mode crosses into “not field-repairable.”
الأسئلة الشائعة
Is a slight hum from a contactor normal?
A faint 50/60 Hz hum is normal for a healthy AC contactor — it comes from the shading ring doing its job. A loud, new, rattling, or intermittent hum is not. If the noise has changed or gotten louder, start diagnosing.
What coil voltage is too low for a contactor?
Anything below 85 percent of the coil’s nameplate voltage will not hold the armature in cleanly. Measure at A1 and A2 under load — not at the supply — because long control runs and weak aux contacts can drop significant voltage.
Can a broken shading ring be repaired?
Not in the field on modern contactors. The copper ring is embedded in the pole face during manufacture. The reliable repair is to replace the contactor.
Why does my contactor chatter only when the motor starts?
The motor’s inrush current is dragging the control supply down. The contactor closes, voltage sags, the armature drops out, voltage recovers, the armature pulls in again — repeat. Fix the supply sag (upsize the control transformer or stagger large load starts) rather than the contactor.
Should I clean contactor contacts with sandpaper?
No. Sandpaper embeds abrasive grit in the soft silver-alloy contact surface and ruins the lapped finish. For light tarnish, use a burnishing tool. For deep pitting, blackening, or welding, replace the contactor.