Your motor stops, the panel goes quiet, and the first instinct is to reach for a reset button. Here is the truth that saves troubleshooting time: an AC contactor does not have a reset button. A contactor is an electromechanical switch that is held closed only while its coil is energized — the moment power to the coil is interrupted, it drops out on its own. What actually “trips” and latches in a motor starter is almost always the thermal overload relay mounted directly beneath the contactor, or occasionally a motor protection circuit breaker (MPCB) and the control-circuit protection upstream. On a residential HVAC system, the “reset” is a controlled power cycle of the whole outdoor unit.
This guide walks through how to reset an AC contactor installation the right way: identifying which device tripped, isolating safely, respecting the cool-down rule, choosing between manual, automatic, and remote reset, and — just as important — recognizing the situations where resetting is the wrong move and replacement is the only fix. If you need a refresher on the hardware itself, start with our AC contactor resource hub.
Does an AC Contactor Have a Reset Button?
No. A standard AC contactor has no reset mechanism because it has nothing to reset. Its armature is pulled in by the coil and released by a spring when the coil de-energizes — there is no latched fault state inside the contactor to clear. When people say “the contactor tripped,” they are almost always describing one of these:
En thermal overload relay latched on a trip and opened its 95–96 auxiliary contact, which cuts coil power and drops the contactor.
En MPCB or motor circuit protector tripped on overload or short circuit.
A control-circuit fuse or breaker opened, so the coil never receives voltage.
In HVAC, a system-level lockout (compressor protection, low-pressure switch, or control board logic) prevents the contactor coil from energizing.
So the practical skill is not pressing a button — it is identifying which of these devices latched, fixing the cause, and re-arming the correct one.
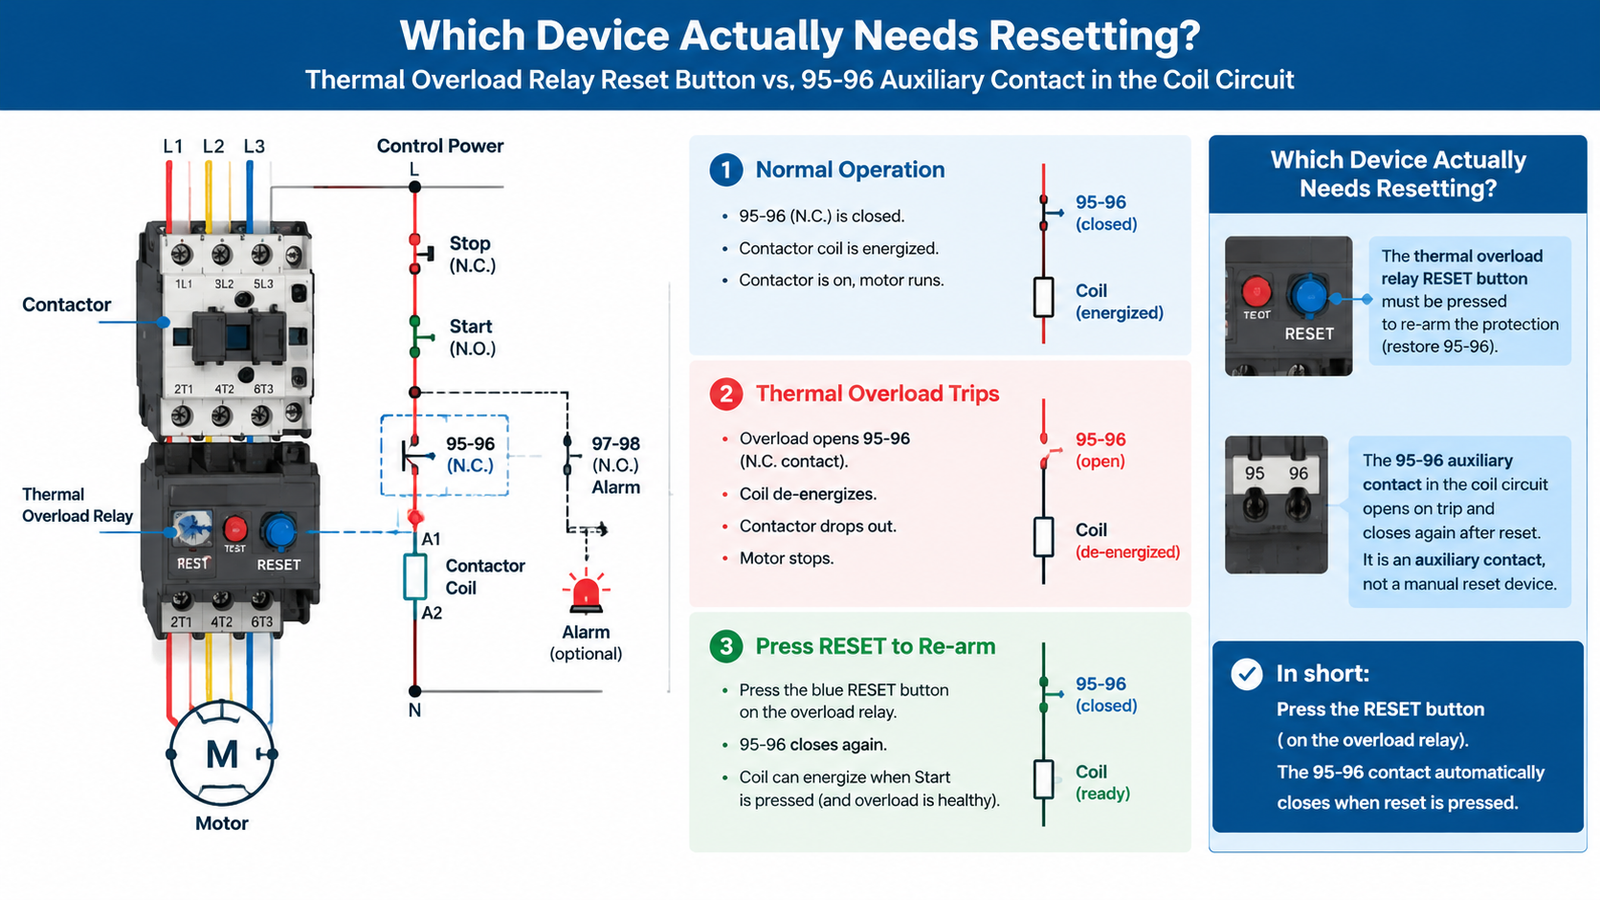
Which Device Actually Needs Resetting?
Use this triage table before touching anything. It maps what you observe to the device that latched and the correct reset action.
What You Observe
Device That Tripped
Reset Action
Red/blue RESET button popped on the block under the contactor; 95–96 open
Thermal overload relay
Cool down, then press the RESET button on the relay
Rotary handle on a breaker-style device sits between ON and OFF (“TRIP”)
MPCB / motor circuit protector
Rotate fully to OFF, then back to ON
Contactor never pulls in; no click; control voltage missing
Control fuse or control-circuit breaker
Replace fuse / reset breaker after finding the short
Outdoor AC unit hums or does nothing; contactor open with thermostat calling
System lockout (HVAC)
Controlled power cycle; wait 5–10 minutes
Contactor stays closed even with control power removed
Welded main contacts — not a trip
No reset possible; replace the contactor immediately
What a Reset Actually Does in the Circuit
Understanding the 95–96 contact makes the whole procedure obvious. In a standard three-wire starter, the overload relay’s 95–96 normally closed contact is wired in series with the contactor coil. When the relay senses sustained overcurrent, its bimetal elements heat, the trip bar latches, and 95–96 opens — de-energizing the coil, dropping the contactor, and stopping the motor. The 97–98 normally open contact closes at the same instant to drive a remote alarm or trip lamp.
Pressing the relay’s RESET button re-latches the trip mechanism, which closes 95–96 again and re-arms the coil circuit. The contactor itself will only pull back in when the Start button (or the control signal) re-energizes the coil. That deliberate two-step design — reset the protection, then restart deliberately — is what prevents an unexpected restart after a fault. The physics behind the trip and the contact states are explained in detail in our thermal overload relay guide, so here we focus only on the reset procedure itself.
Safety First: Isolate Before You Reset
A reset restores power to a circuit that just failed. Treat it like an energization procedure, not a button press:
Stop the machine and inform anyone working near the load.
Isolate and lock out the feeder before inspecting the starter — verify zero voltage with a meter rated for the system.
Look and smell first: discoloration, melted insulation, or a burnt odor means you are done resetting and into replacement territory (see below).
Only after the visual inspection passes should you proceed to the cool-down and reset steps.
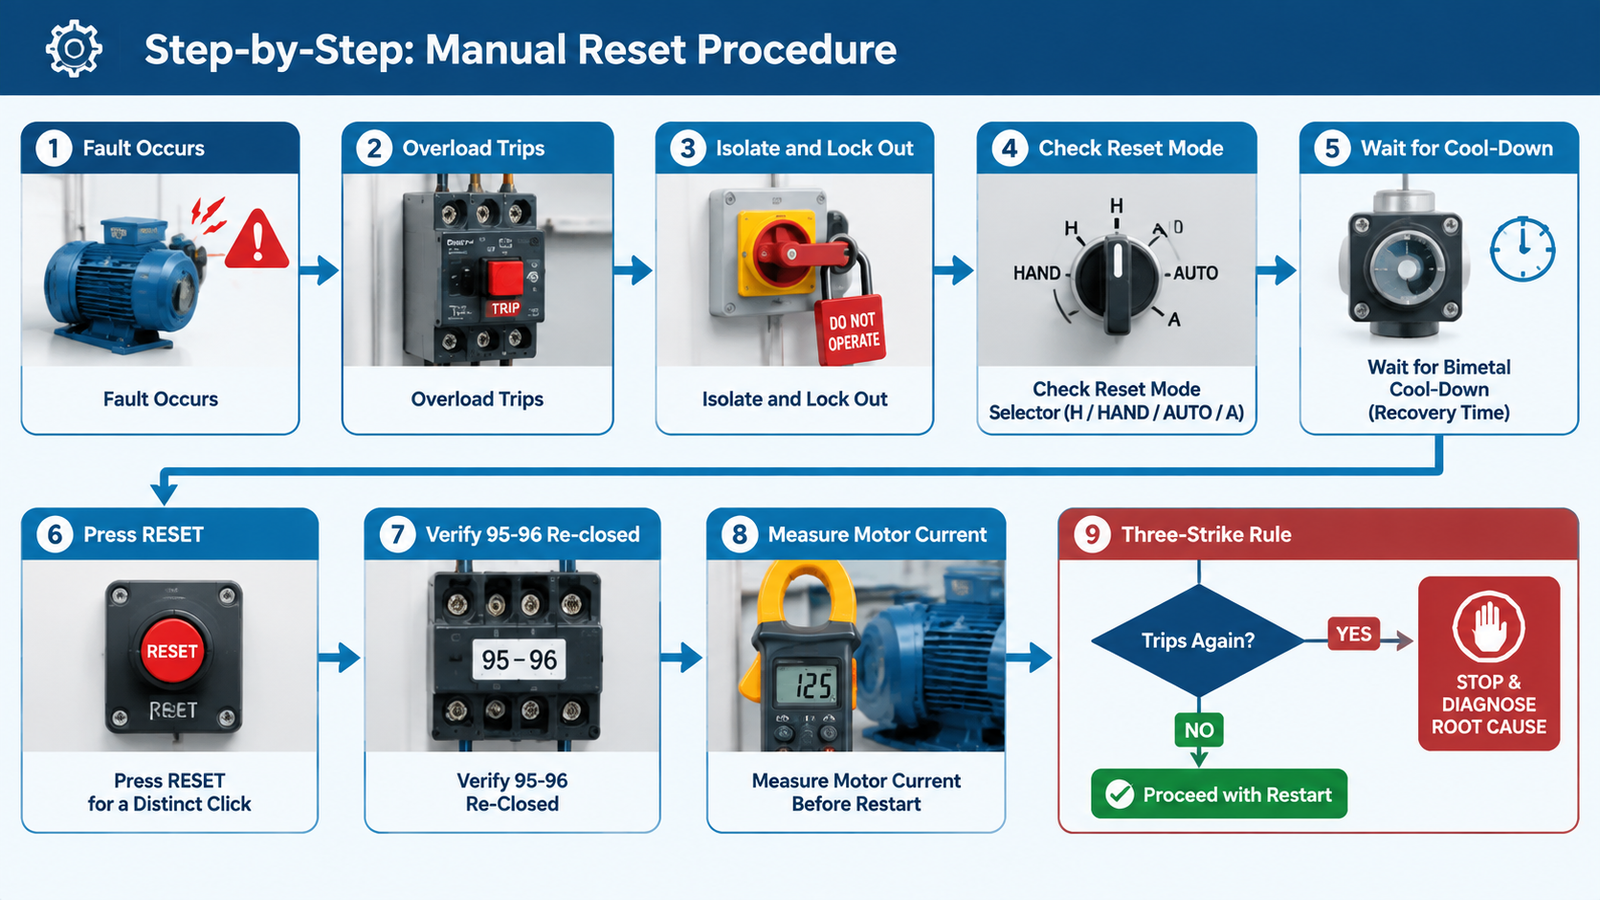
Step-by-Step: Manual Reset of the Overload Relay
Confirm the trip source. Check the trip indicator on the relay (many models show a red trip flag or lever). Confirm no short circuit occurred — a thermal relay protects against overload, not short circuits, so an upstream breaker trip alongside it points to a fault the relay was never designed to clear.
Let the bimetal cool down. This is not optional. The relay has thermal memory: until the bimetal strips cool, the trip mechanism will not re-latch and the RESET button will not engage. Typical recovery time is a few minutes, longer after a heavy overload. Forcing a reset on a hot relay either will not work or defeats the protection.
Check the reset selector position. Many relays have a selector ring around the reset button with positions such as H (manual only), HAND (manual reset + test), AUTO (automatic reset + test), and A (automatic only). On manual settings, someone must press the button; on automatic settings, the relay re-arms itself once cool.
Press RESET firmly. You should hear and feel a distinct click. If there is no click, the relay is still too hot or the selector is in an automatic position.
Verify 95–96 has re-closed. With power still isolated, a continuity check across 95–96 confirms the coil circuit is re-armed. The 97–98 alarm contact should have dropped back to open.
Measure before you restart. With a clamp meter, compare the motor’s expected running current against the nameplate FLA and the relay’s dial setting. If the motor draws near nameplate current and the relay dial matches FLA, a restart is justified.
Restart and watch the startup. Listen for a clean pull-in without buzzing or chattering. A healthy contactor pulls in crisply; noisy operation usually points to coil voltage problems, covered in our contactor troubleshooting guide.
Manual vs Automatic vs Remote Reset
How a relay re-arms is set by the selector, and the choice is a safety decision, not a convenience preference.
Selector Position
Reset Behavior After Cool-Down
Typical Use
H (manual reset only)
Relay stays latched until a person presses RESET
Machine tools, conveyors, any load where an auto-restart would be hazardous
HAND (manual + test)
Manual reset; the button also doubles as a trip/contact test
General industrial starters where periodic contact testing is wanted
AUTO (automatic + test)
Relay re-arms by itself once the bimetal cools
Unattended loads — pumps, fans, HVAC — where a restart is safe
A (automatic only)
Automatic reset; test function disabled
Same as AUTO, without the test feature
Two rules matter here. First, only overload trips should ever auto-reset; a short-circuit or earth-fault event always demands a human investigation before re-energizing. Second, with automatic reset the machine can restart without warning the moment the relay cools — never place your hands in the machine on the assumption that “it tripped, so it is off.” Remote electrical reset accessories exist for panels where the relay is not physically reachable; the electrical reset command behaves like a manual press, and a trip command always overrides a reset command. For help choosing a reset mode for a specific application, see the selection guidance in our overload relay selection guide.
HVAC Systems: Resetting a Residential AC Contactor
Residential and light-commercial air conditioners use a different playbook because the contactor sits in the outdoor condenser unit with no reset button of its own. The “reset” is a controlled power cycle that clears control-board lockouts:
Set the thermostat to OFF so the system does not immediately call for cooling.
Switch off the dedicated breaker for the condenser; open the outdoor disconnect if one is fitted.
Wait at least 5–10 minutes — this covers both control lockout logic and the compressor’s anti-short-cycle protection.
Restore power: disconnect first, then breaker, then set the thermostat back to COOL.
Listen to the startup. The contactor should pull in with a crisp single click and the condenser fan and compressor should start together.
If the contactor pulls in but the compressor hums without starting, the problem is usually the run capacitor, not the contactor. If the contactor itself is pitted, buzzing, or has visibly burnt contacts, reset will not help — match the failure signs against the checklist in how to tell if your AC contactor is bad.
The Cool-Down Rule: Why Rushing the Reset Fails
The most common reset mistake is pressing RESET seconds after the trip. The relay’s bimetal strips are still hot, the trip bar stays latched, and the button simply will not engage. Worse, a motor that overheated enough to trip the relay is also still hot — an instant restart dumps locked-rotor-level inrush into a warm motor. Give the system a few minutes. The exact recovery time depends on how far past the setting the overload current was; a marginal overload may reset within two to three minutes, while a severe stall can take ten or more. If you find yourself repeatedly waiting out the cool-down, the motor is telling you something — measure, do not just reset.
How Many Resets Is Too Many?
Adopt a three-strike rule. One reset after a verified clean restart is normal operation. A second trip within a short period deserves a current measurement before the next reset. A third trip means the reset button is now masking a fault, and every additional cycle is cooking the motor windings.
At two strikes, check these before resetting again:
Running current vs nameplate FLA with a clamp meter on all three phases — look for overload and for phase imbalance above roughly 10%, which itself overheats motors.
Relay dial vs nameplate — a replaced motor or a dial bumped by vibration puts the trip point in the wrong place.
Ambient conditions — a starter enclosure in a hot plant room trips a correctly-set relay because the bimetal runs hot; temperature-compensated relays reduce this, but extreme ambients still shift tripping.
Mechanical load — a jammed pump, clogged fan, or worn bearing raises torque demand and current long before anything visibly fails.
Some conditions look like a trip but are permanent damage, and no button press fixes them.
Sign
Does Reset Help?
Correct Action
Main contacts welded closed; load runs with control power off
No — and it is a safety hazard
Replace the contactor immediately
Burnt or erased coil; coil resistance far from spec
No — the contactor cannot pull in
Replace the coil or the complete contactor
Loud chattering, then failure to hold
No — usually low coil voltage or a broken shading coil
Fix coil voltage; replace if contacts are eroded
RESET button clicks but the motor never restarts
Reset worked; the coil circuit is still open
Check 95–96 continuity, control fuse, and coil voltage
Melted housing, discoloration, burnt smell
No
Replace the contactor and investigate the cause
If inspection turns up any of these, confirm the diagnosis with the measurement steps in how to test an AC contactor, and source a replacement with the correct AC-3 rating and coil voltage for the application. A correctly sized frame — for example, a CJX2-D170 170 A AC contactor for 220/380 V systems paired with its matching overload relay — resets cleanly and trips only when something is genuinely wrong.
Preguntas frecuentes
Where is the reset button on an AC contactor?
On the contactor itself, there is none. The reset button belongs to the thermal overload relay mounted under the contactor in the starter assembly, or to the MPCB if the starter uses breaker-style protection. In HVAC units, there is no contactor reset at all — you power-cycle the system.
Why does my overload relay trip again immediately after I reset it?
Either the bimetal had not cooled enough to fully re-latch, or the overload condition is still present. If the relay resets and the motor trips again within seconds to minutes, stop resetting and measure the running current — the relay is doing its job.
How long should you wait before resetting an overload relay?
Wait until the relay has cooled, typically two to ten minutes depending on how severe the overload was. Many relays physically refuse to reset while hot, which is a designed feature, not a defect.
Is it bad to keep resetting a contactor?
Yes. Each reset re-energizes a circuit that just failed. Repeated resets on a genuine overload gradually destroy the motor windings, and repeated resets on a control-circuit fault can worsen short-circuit damage. Investigate after the second trip.
Why won’t the contactor pull in after I reset the overload?
The reset only re-closed the 95–96 contact. The coil circuit still needs control voltage, a closed stop circuit, and a Start command. Check the control fuse, the stop/emergency-stop contacts, the coil voltage rating against the supply, and only then the coil itself.
Can a welded contactor be reset?
No. Welded main contacts mean the contactor can no longer open the load circuit even with the coil de-energized. This is a dangerous condition: isolate the feeder upstream immediately and replace the contactor.
Conclusión
Resetting an “AC contactor” is really about re-arming the protection around it: find the latched device, isolate safely, let the thermal memory cool, press RESET on the overload relay or cycle the HVAC power correctly, and verify current before restarting. Keep the three-strike rule in your head, respect the cool-down, and treat every second trip as a measurement task rather than a button task. Do that, and the reset button stays what it was designed to be — a deliberate, informed restart after a real fault, not a way to hide one.
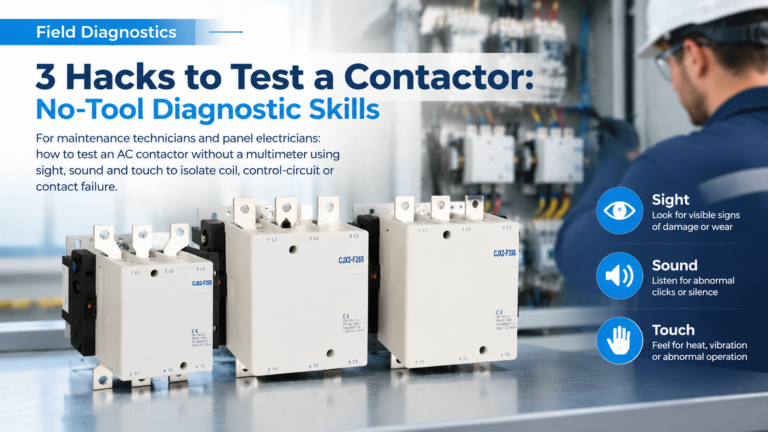
Three field-proven hacks to test a contactor without a multimeter — read what you can see, hear and feel to isolate coil, control-circuit or contact failure before you reach for tools.
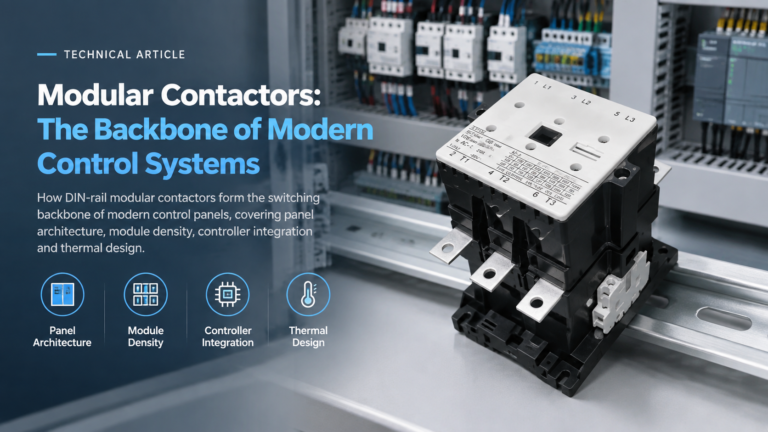
Modular contactors are the structural switching layer of modern control panels. Covers the control chain, the 17.5 mm module grid, IEC 61095 vs IEC 60947-4-1, coil integration and thermal design.
Seven specifications decide whether a modular contactor survives or fails: utilization category, current and derating, poles, coil supply, duty, rail space and protection.