Aviation Electrical Connectors Types Standards and Buying Tips
Explore reliable aviation electrical connectors with MIL-DTL-38999 standards waterproof designs for harsh environments and high-performance aerospace applications
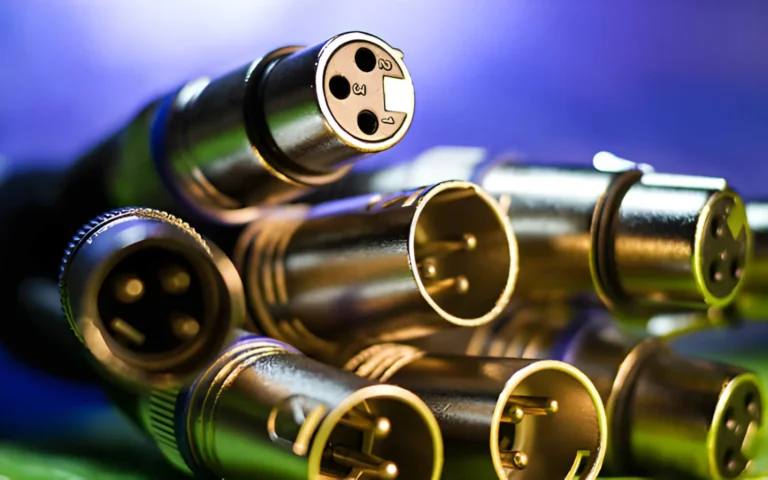
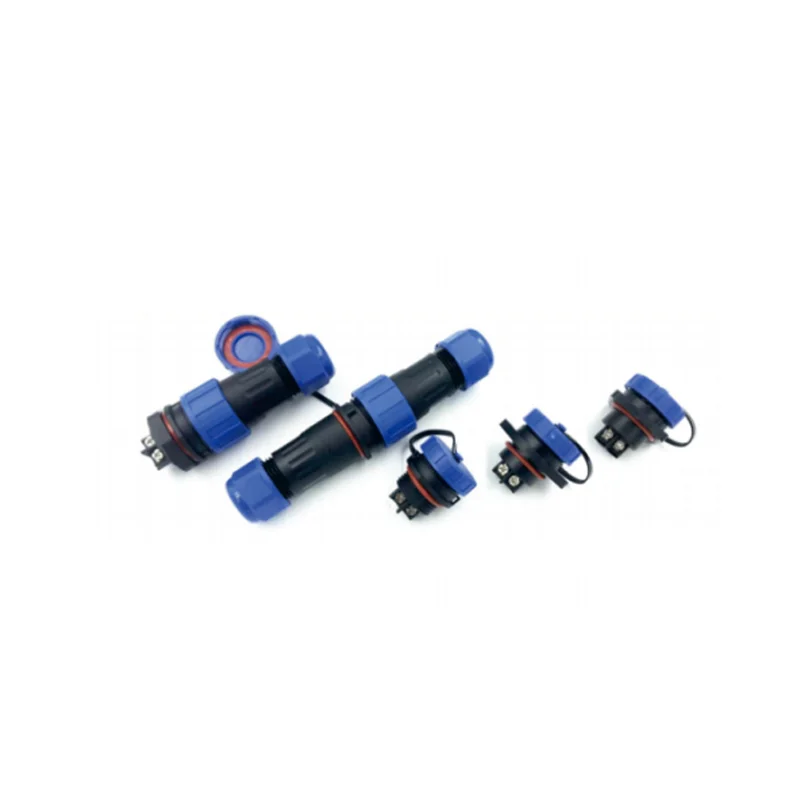
Read MoreAviation connectors come in various types tailored to different industrial and electronic needs. Common series include GX12, GX16, GX20, the SP-series waterproof connectorse MIL-DTL-5015 equivalents widely used in military and aerospace applications.
| Series | Descrição | Aplicativo | Waterproof Rating |
|---|---|---|---|
| GX12/GX16/GX20 | Circular connectors, various pin counts | Industrial equipment, sensors | Typically IP67 |
| SP-Series | Robust waterproof connectors | Outdoor/harsh environments | IP67 to IP68 |
| MIL-DTL-5015 | Military-spec heavy-duty connectors | Aerospace, defense | IP67 and above |
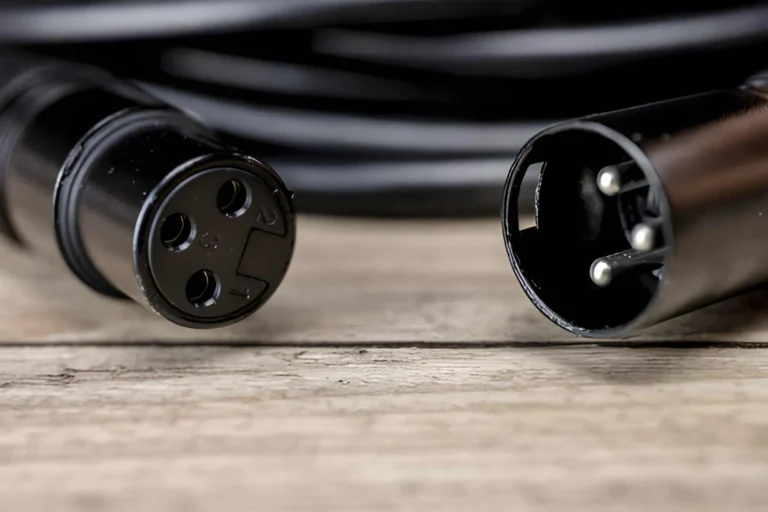
Understanding connector gender and mounting style is crucial for proper mating:
When wiring or selecting aviation connectors, evaluate the following critical specifications:
| Especificação | Importance | Typical Values/Types |
|---|---|---|
| Pin Count | Matches wiring needs | 2–20 pins commonly |
| Current/Voltage | Ensures electrical safety and functionality | Rated per connector specs (e.g., 5A, 250V) |
| IP Rating | Waterproof and dust protection | IP67 (no water ingress), IP68 (immersion) |
| Coupling Mechanism | Secure mechanical connection | Threaded, bayonet, push-pull |
Selecting connectors with the right pinout, electrical ratings, and environmental protection is essential for reliable aviation connector wiring, especially in harsh or industrial settings.
To get your aviation connector wiring done right, you need the right tools and materials. Here’s what I recommend:
Using the right setup makes your circular aviation plug wiring neat, durable, and reliable every time. For a broad selection of durable components, you can check out reliable suppliers offering a wide range of connectors and accessories. For instance, industrial remote control transmitter sets come with some compatible aviation connectors that are perfect for tough applications.
Before you start wiring your aviation connector, choosing the right wire gauge and type is crucial. Stranded wires are generally preferred over solid core because they flex better and handle vibration well, which is common in aviation and industrial settings. If your project needs extra protection from interference, opt for shielded wires to reduce EMI (electromagnetic interference).
Next, measure and carefully strip the wire insulation to the correct length—this depends on whether you’re soldering or crimping. For solder cup aviation connector termination, leaving about 5-7 mm of exposed wire is typical. If crimping, follow the crimp terminal’s specs to avoid too much exposed conductor or too little, which leads to poor contact. Avoid nicking or damaging strands during stripping as this weakens the connection.
One vital but often overlooked step is sliding on backshells, sealing gaskets, and heat shrink tubing before terminating the wires. This makes sure you can easily fit and seal everything once the connector is wired, saving you from having to redo your work. These components provide strain relief, waterproofing (especially for waterproof aviation connectors with IP67/IP68 ratings), and physical protection, ensuring the wiring holds up under harsh conditions.
For reliable multi-pin aviation connector cable assembly, prepping wires and hardware carefully sets the foundation for strong, long-lasting connections. For quality parts suited to industrial use, check out dependable LD20 series aviation connectors offering solid performance and sealing options.
When wiring aviation connectors, choosing between crimping e soldering is a key decision. Both methods are common but suit different needs depending on your application.
Crimping is the preferred method in vibration-heavy environments since it creates a strong, mechanically secure connection without heat.
Step-by-step process:
Crimped aviation connectors often perform better in industrial and rugged setups thanks to their vibration resistance and consistent electrical contact.
Soldering is common for prototypes or small batches where speed and adaptability matter.
Key tips for soldering aviation connectors:
Soldering requires a skilled hand to avoid issues like brittle wires or shorts.
| Recurso | Crimping | Soldering |
|---|---|---|
| Durabilidade | High (excellent for vibration) | Moderate (prone to fatigue) |
| Skill Required | Moderate (die/tool dependent) | High (heat control critical) |
| Speed | Fast once set up | Slower |
| Equipment Cost | Medium (crimping tools needed) | Low (basic soldering kit) |
| Repairability | Easier (replace contacts) | Harder (resolder needed) |
| Best Use | Industrial, field applications | R&D, prototypes, small batch |
Choosing the right wiring method ensures your aviation connector wiring holds strong under its specific demands, whether it’s a rugged industrial environment or a quick lab prototype.
For more detailed guidance, check out this aviation connector cable assembly page covering termination and connection tips.
When working with aviation connector wiring, understanding standard pin numbering is essential, especially for popular GX-series connectors. Typically, a 2-pin connector is used for simple power connections, while 3 to 5-pin connectors handle signal or combined data and power lines. Larger connectors from 5 to 9 pins allow more complex multi-signal wiring setups.
Here’s a quick overview:
Applying consistent color coding makes troubleshooting and future maintenance easier. Use:
Most aviation connectors, including GX-series, feature built-in keying or polarization to ensure connectors only mate one way. This prevents wiring errors and damage. Always check for the key position or notch alignment before final assembly.
Handling pin assignments carefully with proper keyed connectors maintains signal integrity and avoids costly mistakes. For a detailed wiring experience, many users find a clear GX16 aviation connector wiring diagram helpful.
If you want to ensure watertight sealing along with correct wiring, it’s worth reviewing wilmall’s cable gland installation guide with watertight sealing tips to maintain environmental protection when assembling your aviation connector cable assembly.
Wiring a 4-pin waterproof aviation connector, like a GX16 or GX20 from the GX-series, can be straightforward if you follow the right steps. Here’s a clear, step-by-step guide to help you get it done correctly.
Select the right wire gauge (usually 18-22 AWG for typical signals). Strip about 5-7mm of insulation to expose the conductor – just enough for the solder cup or crimp contact.
Before terminating, don’t forget to slide the connector’s backshell and waterproof sealing gasket onto the cable. This step is crucial for proper sealing later.
Crimping: Insert the bare wire into the crimp cup of the pin and use the correct crimp die. Perform a pull test to ensure a solid crimp.
Soldering: Pre-tin the wire strands, then heat the pin cup carefully without overheating. Fill the cup with solder and let it cool naturally.
Insert Pins into Connector Body:
Push each terminated pin into its slot. You’ll typically hear a click when locked in place. Make sure the pins line up with the correct pinout (refer to the aviation connector wiring diagram for your model).
Slide the gasket forward and tighten the backshell to compress the seal. This ensures the connector achieves its waterproof rating (often IP67 or IP68).
Mate the plug with the socket to check for smooth connection and correct orientation. Verify no excessive play or misalignment.
Check pin termination first. Poor crimp or cold solder joints often cause breaks. Use a multimeter to test continuity pin-to-pin.
Pins should lock firmly in the housing. If pins pull out easily, re-crimp or re-solder the contacts and ensure they are fully seated.
Verify that the gasket is in place and properly compressed by the backshell. Using heat shrink tubing over the cable entry can enhance sealing as well.
Having a solid, waterproof aviation connector assembly like this reduces downtime and keeps your industrial or aviation-grade equipment safe from harsh environments. For quality components and detailed wiring guides, I recommend checking out reliable suppliers with a strong range of waterproof aviation connectors like those available at Wilmall aviation connector.
When wiring aviation connectors for harsh environments, reliable waterproofing is crucial. Make sure to properly compress gaskets and use strain relief components to prevent water ingress and mechanical stress on the cable entry points. This ensures your waterproof aviation connector maintains its IP67/IP68 rating under tough conditions.
Shielding and EMI protection are equally important. Use connectors with built-in shielding or add external braided shields, grounded backshells, and ferrite beads to minimize electromagnetic interference. This protects sensitive signals in multi-pin aviation wiring harnesses, especially in industrial applications.
Vibration and temperature swings can also take a toll. Choose materials resistant to corrosion and thermal cycling, and install secure backshells to reduce cable movement and wear. Using vibration-resistant connector wiring and proper strain relief can prevent loose contacts and signal failures.
Finally, thorough testing is non-negotiable. Check continuity and insulation resistance with a multimeter, perform pull tests on terminated contacts, and if possible, simulate environmental conditions to confirm the connector’s durability. These steps ensure your aviation connector cable assembly will perform reliably, no matter the environment.
For best results, consider tools and products designed for these demands, such as the robust silicone rubber cable glands available at Wilmall, which enhance sealing and strain relief in industrial aviation connector installations.
Wiring aviation connectors might seem straightforward, but small errors can lead to big problems later. Here are the most common mistakes to watch out for when working with circular aviation plug wiring, especially for waterproof aviation connectors like GX-series or MIL-spec types:
Avoiding these pitfalls ensures your circular aviation plugs and waterproof aviation connector wiring last longer and perform reliably, even in tough industrial environments. For more detailed guidance on wiring and assembly, you might find practical industrial control and connector resources useful to streamline your process.
When looking for quality aviation connectors, focus on key factors like durable material quality, consistent IP rating (especially IP67 or IP68 for waterproof aviation connector needs), fair pricing, and ready availability. Reliable suppliers should offer connectors that meet industrial standards such as MIL-spec circular connector wiring and provide clear specifications on current, voltage, and pin configurations.
Wilmall is a strong choice for sourcing aviation connector wiring solutions. Their extensive selection covers everything from GX12 to GX20 series and includes waterproof aviation connectors that support harsh environments. With competitive pricing and proven reliability, Wilmall ensures you get connectors that perform well in demanding industrial applications. Check out their range of SD20 series connectors and durable circular connectors designed for vibration-resistant and waterproof setups. This variety makes Wilmall an ideal supplier whether you’re assembling multi-pin aviation wiring harnesses or need panel mount aviation plug installation parts.
Choosing a trusted supplier like Wilmall guarantees access to quality aviation connectors that fit your specific wiring and environmental needs without breaking your budget.